CAPTURE ONE & RAW PROCESSING TIPS
CAPTURE ONE FROM PHASE ONE: Capture One Pro is a RAW editor and file management system, made by the medium format camera company, Phase One. Capture One has individual color profiles for every camera, so that when the files are imported, you get something that’s pretty close to the preview on the back of the LCD screen. In Capture One Pro, the color options include shadow, mid-tone and highlight adjustments for color balance and a channel dedicated just to adjusting skin tones, making it easy to remove skin redness. Capture One also has a luminance curves adjustment option.
Create a Catalog: Start CaptureOne program and select New Catalog or File —» New Catalog —» Name (name the catalog) —» Location (choose a location) —» OK —» Import —» Import From —» expand the arrow and select a folder to import —» check Exclude Duplicates —» Import To —» Destination (expand the arrow and select a folder) —» select Import All or choose photo to import —» OK
EDITTING – VIEWER & THE BROWSER PANEL FEATURES
Comparing Image – Before and After: Click Before icon or type Y or Shift + Y to split the screen to view before and after.  The split screen can be expanded by dragging left and right. Photo editing can be made using the adjustment panel on the left.
Camera Data: The bottom-left corner of the Viewer displays the camera data that includes the exposure settings (ISO, shutter, and f-stop) as well as the focal length of the camera lens used to capture the image. 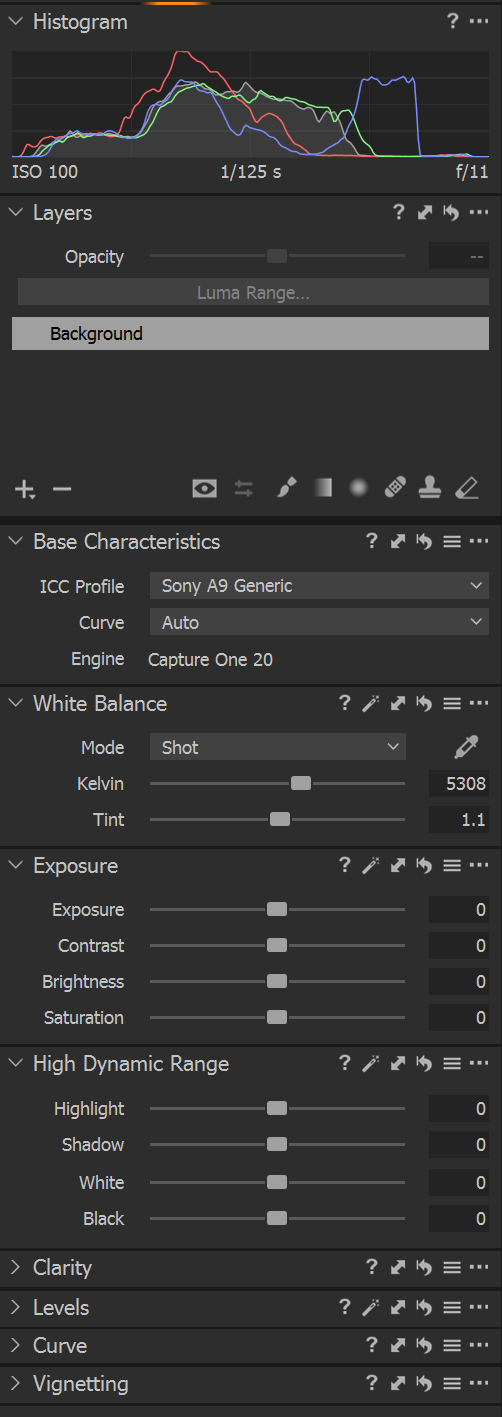 (Radeon RX 580 Series) —» select Display —» select the recommended screen resolution for the display —» select Advanced display settings —» select Display adapter properties for Display 1 —»
Displaying the color tag and star rating: The bottom right corner displays the color tag and star rating applied to the image. Click on the box or star icons to alter the rating or tag.
Changing the Viewer Background Color: Simply click the Viewer background —» RMC —» select the color to change or View —» or select View —» Customize Viewer —» Background color —» select a color to change.
The Viewer Modes: The Viewer has three primary viewing modes (top left of the photo). Multi View is default. Primaty and Proof Margin.
Multi View Mode: The Multi View mode enables up to 12 images to be simultaneously displayed in the Viewer. The displayed images are selected from the thumbnails in the Browser. View —» Customize Viewer —» Multi View Mode or in Viewer Toolbar —» click the View mode icon. To diplay more than one image at a time —» click on a single thumbnail —» Shift + select another thumbnail. All the thumbnails in between will also be selected. To deselect the active thumbnail —» Shift —» select the thumnail. All the thumnails in between will be deselected. All the images in the Viewer can be zoomed by holding down the Shift key and scrolling the mouse wheel. To zoom a selected image —» click the image and scrolling the mouse wheel.
Proof Margin Selecting: The Proof Margin mode enables users to toggle between two different Viewer margin (mép, bờ, lề) settings (switching icon is at top left Viewer). The margin is the distance between the edge of your image and the frame of the Viewer. The Proof Margin option can be used to adjust the distance between multiple images in conjunction with the Multi View mode. When a single image is displayed, it can be used to view a single image with a print margin.
The Browser Features: There are several Image Browser viewing options to help designer get the best user experience as follows.
- Browser On/Off —» View —» Browser —» checked=On, unchecked=Off.
- Browser View Options —» View —» Customize Browser —» select one of these options —» Place Below - Labels - Decrease/Increase Thumbnail Size.
The Library Tool Tab: The Library tool tab is a filtered file explorer that displays supported files. It allows access to images within Albums, Smart Albums, and Favorites and to any image collections stored in folders on a computer or networked resource.
The Library tool tab is where all file navigation and organization takes place. Navigate via the hierarchical tree-view to a folder that contains the image files designer wish to edit. Thumbnails of the images within designer selected folder will be created and displayed in the Image Browser. The Library tool also enables access to images within Catalogs, Folders, Session Folders, Session Albums, and Session Favorites. Within a session, the Library tool features an Output Folder, a Selects Folder, a Capture Folder, a Trash Folder, and enables users to browse between the recently used sessions.
The Library tool will feature fixed menus and albums and a Folders tool when a catalog is used. Capture One applies non-destructive editing because any image adjustments will not affect the actual RAW file, only the Capture One settings file will be changed. Create a catalog or session to help organize your workflow.

The Lens Tool Tab: The Lens tool featuring Lens Correction - Purple Fringing - Crop - Rotation & Flip - Keystone - Grid and LLC. It is designed to correct a number of unwanted issues that are commonly associated with lens distortion. Capture One incorporates a number of preset profiles that are available for medium format and DSLR lenses that will greatly improve image results when used appropriately.  Adjustments can also be applied manually to correct individual issues.
- Crop: Ratio —» Output —» Size (ex: 4K monitor = 3840 X 2160 px) —» Shift + drage corner of image to maintain the aspect ratio —» Alt + drage the image's corner to crop using the center as the anchor point —» LBM hold down to move the crop window —» Enter (to crop).
The Color Tool Tab: It has a number of tools including Histogram - Layers - Base Characteristics - White Balance - Color Editor - Color Balance - Black & White to help control the colors of an image file. The Layers tool allows designer to make localized adjustments with masks.  This tool is also available in some other Tabs.
The Exposure Tool Tab: It provides controls to adjust exposure aspects of images. Basic controls (e.g. Exposure Compensation) affect the whole image, while advanced controls (e.g., High Dynamic Range) enable users to fine-tune adjustments. 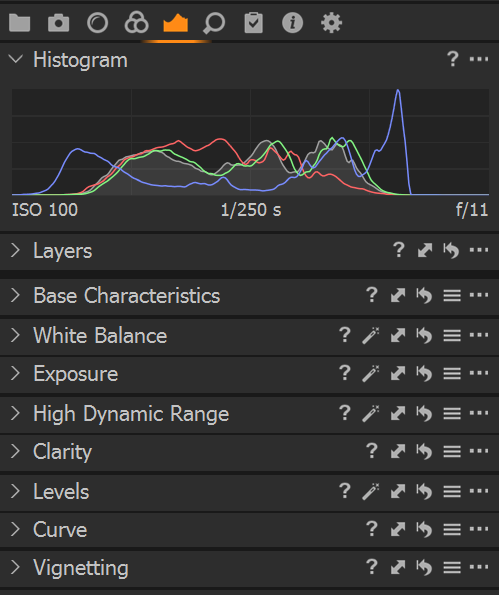 Structure adds edge definition to areas of fine detail. It's great for landscapes, architectural, and animal details, to name but a few.
Exposure: Much like adjusting it on camera will brighten or darken the whole range of tones in the photo. Photo as taken vs. contrast adjustment. Contrast is a very common adjustment slider but if pushing too hard, blacks will be too dark and the photo starting to look unpleasant, and photo details will be lost in highlights. The contrast slider is actually a perfect blend of an RGB curve and a Luma curve. It gives designer the ability to push it a little harder than normal, but keeping the color nice and stable, but with a hint of saturation increase. Brightness controls the light of the photo but differently than exposure in that it's focused more on adjusting the mid-toness without affecting the brighter and darker areas of the photo. Saturation adjustment so colors don't burn out. This helps keeping natural good looking colors on the photos, even if designer boots the saturation a lot.
- Adjusting Exposure Manually —» select the image to be adjust —» Exposure Tool Tab —» Exposure —» move the slider to adjust.
- Auto Adjusting Exposure —» select the image to be adjust —» Exposure Tool Tab —» Exposure —» select Auto Adjust Exposure. Select Reset Exposure adjustment to cancel previous Auto Adjust Exposure.
High Dynamic Range tool is designed to simulate high dynamic range imagery from a single image and is not meant to merge an exposure bracketing sequence consisting of multiple images. It is good practice to adopt optimal exposure techniques, such as ETTR, to minimize noise and maximize the sensor’s potential dynamic range to capture the widest range of tones without losing detail in the extremes, the sensor’s dynamic range cannot be extended in a single image beyond its specification in reality. This tool can do two things, recovering details in highlights and shadows for more dynamic range, or amplifying them where more constrast is needed. By adopting separate Highlight and Shadow sliders, the High Dynamic Range tool compresses the extreme tonal values in an image to simulate a wider dynamic range.
SPONSORED CONTENT

Your Service Flyer
Your Event Invitation

Your Promotion Ads

Your Logo & Brand
Support us and grow your business with us. My goal was to make technical information available with ready access to commonly needed resources, formulas, and reference materials while performing my work as a Technical Support Engineer. The businesses listed in Sponsored Content were carefully selected because of their uniqueness. However, non-sponsored selected ads will be rotated monthly.
ViBa Direct lacks an advisory board to do research and hire writers with the latest technical knowledge. Creating an effective advisory board requires more than an invitation. Without your sponsorship, this is not possible. If your company is interested in placing the company’s logo, brand, event invitation, and other promotional banners and flyers here or on any other pages, please reach out to Customer Service for more detail.
The Highlight slider lowers the brightness in the highlights and is used to recover detail from overexposed regions. If a channel is clipped accidentally, the tool can use the data in the other channels to reveal detail. By analyzing the color data in the shadow regions, the HDR tool's Shadow slider adopts similar technology for determining and recovering detail that is no longer visible from underexposed images. 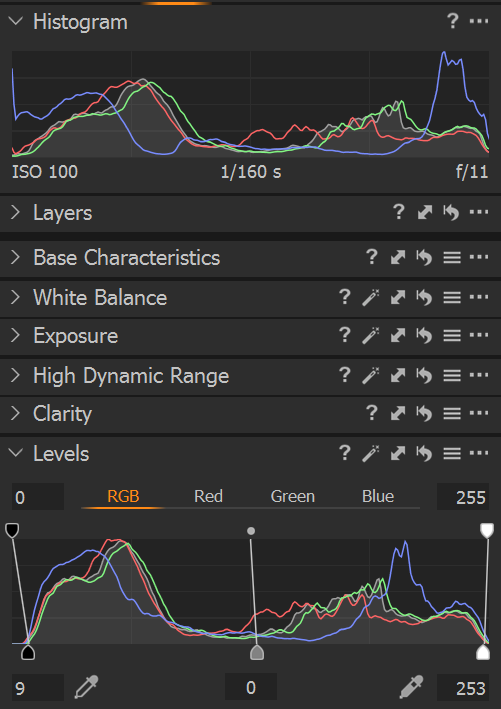 As the brightness is increased in the shadows, the excessive adjustment should be avoided where possible. Otherwise, noise is likely to become visible.
Adjusting the Shadow and Highlight sliders in the High Dynamic Range allows not only the recovery of shadows and highlights but provides the possibility to amplify the ranges, increasing the contrast. The Black slider is great for making the photos a nice dark, rich black, but users have to push it more than normal before it clips (all data are lost at either end of the tonal range, so highlights will be blown and shadows will be total black). It works similarly to the highlights, but only in the brightest areas of the highlights. This makes very useful for fine-tuning highlight adjustments.
The Black and White sliders are used for better control of the darkest shadows and the brightest highlights making it possible to fine-tune contrast using the High Dynamic Range tool only. In case more control is needed, the Levels and Curves tools can be used. To adjust —» select the image to be adjust —» Exposure Tool Tab —» High Dynamic Range —» move slider to adjust Hightlight, Shadow, White and Black. Select Reset High Dynamic Range adjustment to cancel previous Auto Adjust HDR.
Clarity tool is another way of adjusting contrast. Unlike contrast, the result is much more pleasing. clarity is used to fine-tune the mid-tones of the photos. It can be pushed to quite a high value without losing details in the shadows and the highlights.
Levels shows histogram, and is really a graphic representation of the tones in the photo from shadows on the left to highlights on the right. Level —» Auto adjust —» to see a nice contrasty photo or use the handles to adjust them manually. Noticed the values at the top of the histogram. By bringing in the handles at the bottom is to instruct Capture One to remap the histogram to those values. If it's stretched too far, adjust the handle bar at the top of the histogram to reduce the values. The middle handle controls the brightness of the midtones, much like the brightness slider.
Curve tool also show a histogram overlay, and it has been the mainstay tool for adjusting contrast and brightness. 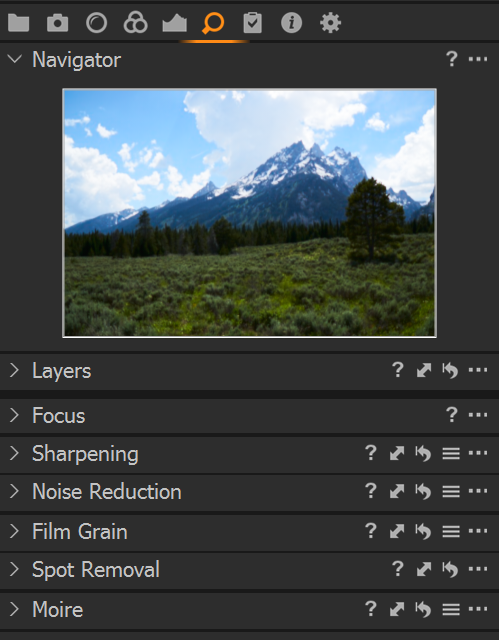 The advantage of the curve tool is that it allows very precise control of contrast and brightness. It's used by first creating a point on the curve and changing its position. Many control points can be added or a single point just to brighten the midtones. Adjusting a photo with an RGB curve will change the photo contrast. But an additional unwanted effect is that if we increase contrast, color saturation is also increased. With the Luma curve, contrast is the only thing that is modified. This time, color is completely taken out of the adjustment. It's a highly effective tool if the photo color is perfected, but we just need to tweak contrast a little. However, designers are used to higher contrast photos, perhaps having higher saturation. Think of a bright, sunny day compared to a drab overcast day. Therefore, when we use a Luma curve for the first time, we might think the results are a little bit odd. But this takes us back full circle to the contrast slider.
The Details Tool Tab: It provides controls to adjust image's Sharpness, Noise Reduction, Film Grain, Sharpening, Moiré, and Spot Removal.
- Noise Reduction: Luminance noise exists in every digital image. Noise is caused by the light-sensitive chip regardless of ISO. Normally, this noise is more visible at high ISO values. Higher Noise levels at high ISO values are caused because the signal has been amplified. To remove noise from image —» Details —» Noise Reduction —» Luminance (adjust the level of luminance noise often present in shadow areas) —» Detail (adjust to a smaller value to achieve a smoother surface of an image) —» Color (adjust the level of chromatic noise that are typically noticeable as subtle green & magenta patterns) —» Single Pixel (to eliminate a single white pixel appeared from using a long shutter speed, although it can also affect the rest of the image).
- Film Grain tool can be used to alter the image aesthetic by adding a realistic interpretation of film grain to digital images. The Grain tool may be used to add texture to digital images that have an excessively smooth or “polished” appearance, possibly after adding too much noise reduction or after adjusting the negative Clarity settings. If this is the case, the Film Grain tool may be used to create a more natural-looking image. Increase Impact (contrast) and Granularity (grain size) with caution. A number of built-in presets for different grain-effects are available from the tool's Action menu. Details —» Film Grain —» select the grain type —»
IMPORTING & ORGANISING PHOTOS
Importing: 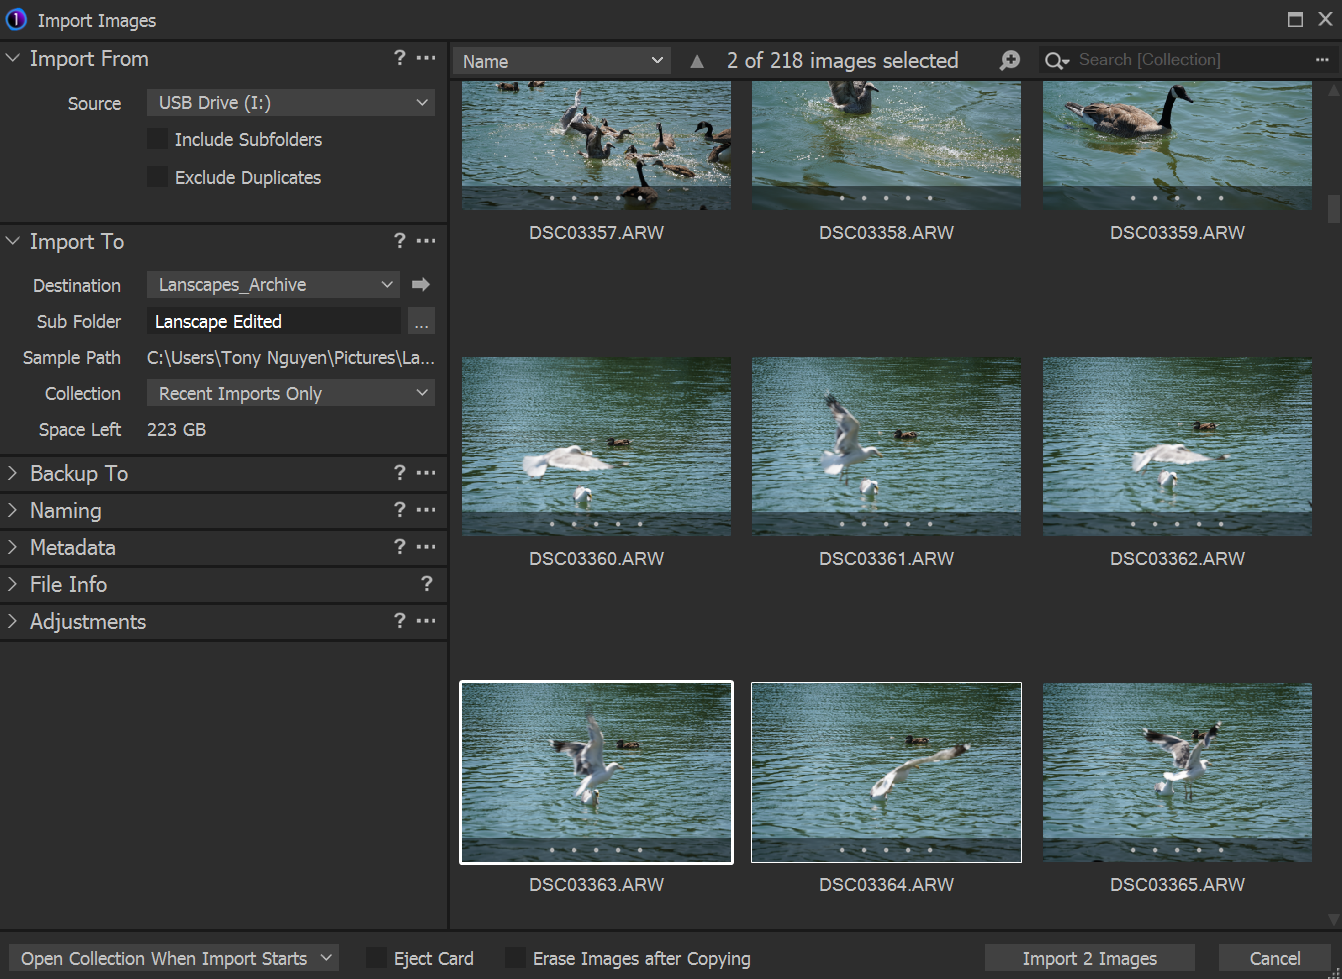 File —» New Catalog —» Name (name your catalog, ex: Landscapes) —» Location (pick a location) —» Template (leave as Blank) —» check Open in new window —» OK —»
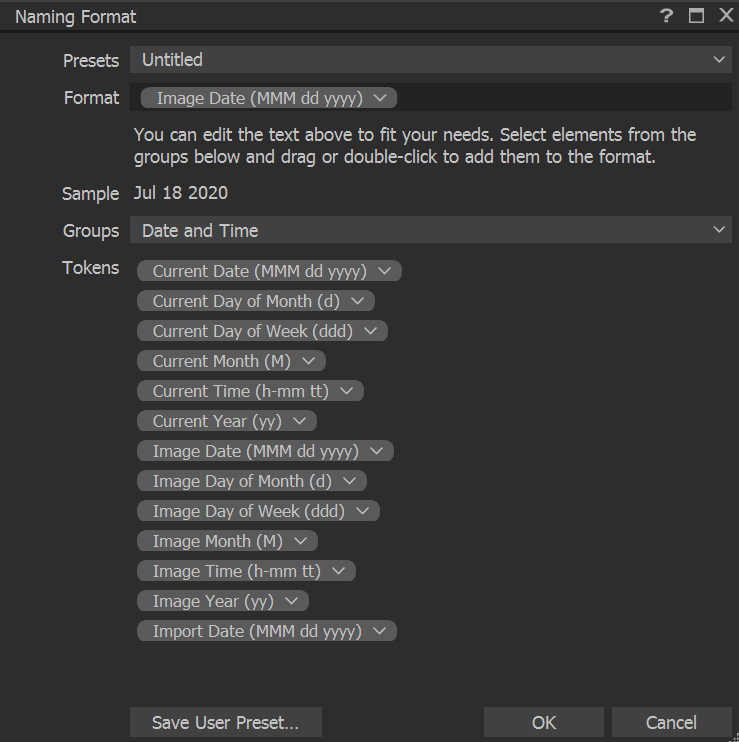
Import Images from a Memory Card —» Insert a memory card —» Images from memory card is automatically loaded in Capture One window —» Import To Destination (create a folder, ex: Landscape Archive, and this will be Top Level folder) —» select created folder —» Sub Folder (to store choose/selected images) click to activate and name the folder, ex: Landscapes Edited) —» select an images or Ctrl + select images from the viewer —» Collection (select Recent Imports Only —» Import 1 Image —» To import more images —» File —» Import Images —» Source (check Exclude Duplicates) to import all —» Sub Folder, click ... to expand options —» Group (select, ex: Date and Time) —» Token (ex: click + hold + drag and drop Image Day in Format) —» other Tokens can be added —» to mix and match (ex: click + hold + drag and drop others Token in Format) —» Presets (select Sve User Preset) —» Name (ex: US MDY Format) —» Save —» OK —» select Import All. In Library Tree, expand Folders to see all created folders and imported files.
Import Images from a Local Folder —» File —» Import Images —» Import From, Source (select a folder) —» Import All
Catalog vs. Session: The differences between the catalog and the session are basically how photos are stored on local drive. The functionality between the two systems is very similar although there are some advantages to both. Session includes Capture - Output - Proof - Trash folders. It can be scattered everywhere as long as they are organized exactly the same. Catalog includes Original - Edit folders and since everything is stored under originals, il lives in one location.
- Catalog: Edit + Originals
- Session: Capture + Output + Proof + Trash
Catalog is very portable, Original folder can be copied to a portable device, and if used on a different computer the images can be edited using Capture One and when the drive is reattached all subjects will be updated. Session is as portable if copied the directory to a device, reattached all subjects will be updated. Catalog and Session typically are the same although their structure is considerably different. Session is better when scalability (memory storeage) is needed.
Creating a New Catalog: File —» New Catalog —» Name (ex: Landscapes) —» Location (ex: D:\2020_Catalog) —» OK —» Import —» Import From Source (chose a folder) —» Select Folder —» check Include Subfolders —» here, select the photos to import or click Import All.
Organizing with Session:
BASIC ADJUSTMENT AND SPECIFIC SETTINGS
Image Preview Setting: Catalog Collections —» select All Images —» Edit —» Preferences —» Images —» Review Image Size Default = 2560 (px) or at least the same size of the monitor. The window preview size should be set appropriately to the monitor. For 4K monitor the pixel should be 3840 —» change the Preview Image Size —» close the Preferences window —» Image tab —» Regenerate Previews.
Basic Adjustments: Select an image —» select Color tool tab —» White Balance (adjust Kevin if needed) —» select Exposure tool tab —» Exposure (adjust Exposure if needed) —» Contrast (adjust if needed) —» Bightness (adjust if needed) 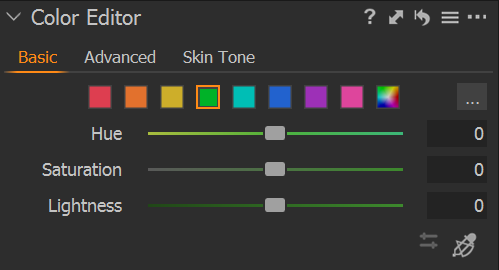 —» Saturation (adjust if needed) —» High Dynamic Range —» Hightlight (adjust if needed) —» Shadow (adjust if needed) —» Clarity —» Clarity (adjust if needed) —» Structure (adjust if needed) —» Vignetting —» Amount (adjust if needed).
Color Adjustments: Select an image —» select Color tool tab —» Color Editor —» select Basic —» select a color —» adjust Saturation —» select other colors to adjust.
Black and White Conversion: Select an image —» select Color tool tab —» Black & White —» select Color Sensitivity —» check Enable Black & White —» image density is controlled by adjusting Red, Yellow, Green, Cyan, Blue and Magenta.
HEALING AND CLONING FEATURES
Difference Between Cloning and Healing: Cloning (sao lại, bản sao, làm thành hai bản) is usually better for creating, duplicating or removing objects or elements in a scene, and the Healing (làm lành lại) is better suited for adjusting the textures of objects. Both of these tools let designer select a sampling (lấy mẫu) point. This is the part of the image we want to keep, and paint over distractions (sự làm sao lãng) and blemishes (thiếu sót, vết nhơ). The clone tool paints a complete copy of whatever we select. However, the Healing tool keeps the Highlights and Shadows of wherever we’re painting and only paints the color of the sampling area. This makes the Clone tool much more suitable for areas with defined edges, since the Healing tool will only blur the Color with messy, smudged edges.
To Remove Blemishes: To be continued...


